SketchUp Resources
To use the models, you need to have SketchUp installed on your computer. You can create an online account that gives you web based access to the current free version of SketchUp called SketchUp Free. That version is very full featured and you can do a lot with it. In fact, when I started doing this, the first few versions of the chiller plant model were created in the free version of SketchUp 8.
And, to the best of my knowledge, you could create objects and content similar to any of my models using the current free version. In addition since the current free version runs in a web browser, you are not as restricted by the operating system (Mac vs. PC, 64 bit vs. 32 bit) and the graphics card that you have in t to the extent that you would be if you were running the software locally.
But, currently, the free version will not support uploading files that are the size of the models I have developed.
In talking with the folks at Trimble about this (they own SketchUp), I suspect that restriction will eventually go away with a subsequent release. Meanwhile, the buttons below will take you to some options that will allow you to work directly with the models on your computer along with some related information you will need to know to install and use SketchUp.
Be sure to to take a look at the section titled A Few Details About Installing SketchUp because it covers a number of common questions that come up.
Option 1 - Using SketchUp Viewer
With the release of SketchUp 2019, Trimble also released a product called SketchUp Viewer. It is designed to let you navigate through a model but that is about it. Having said that, if you just want to "test the waters" but don't want to "jump in the pool", then SketchUp Viewer is probably the way to go.
This link will take you to the download page. If you don't have a Trimble or Google account, you will need to create one to gain access to the actual download page (there is no charge). But once you have created and account and/or logged in, the link should take you to the download page which includes a SketchUp Viewer download along with downloads of the other current products..
The Viewer does not have any of the drawing tools or other standard features typically found in SketchUp. So, if at some point, you want to try your hand at that, you will need to install the current free version or one of the legacy versions in the next section.
|
But, after you download and install install SketchUp Viewer, you will be able to open and navigate through my SketchUp models (or anybody else's for that matter).
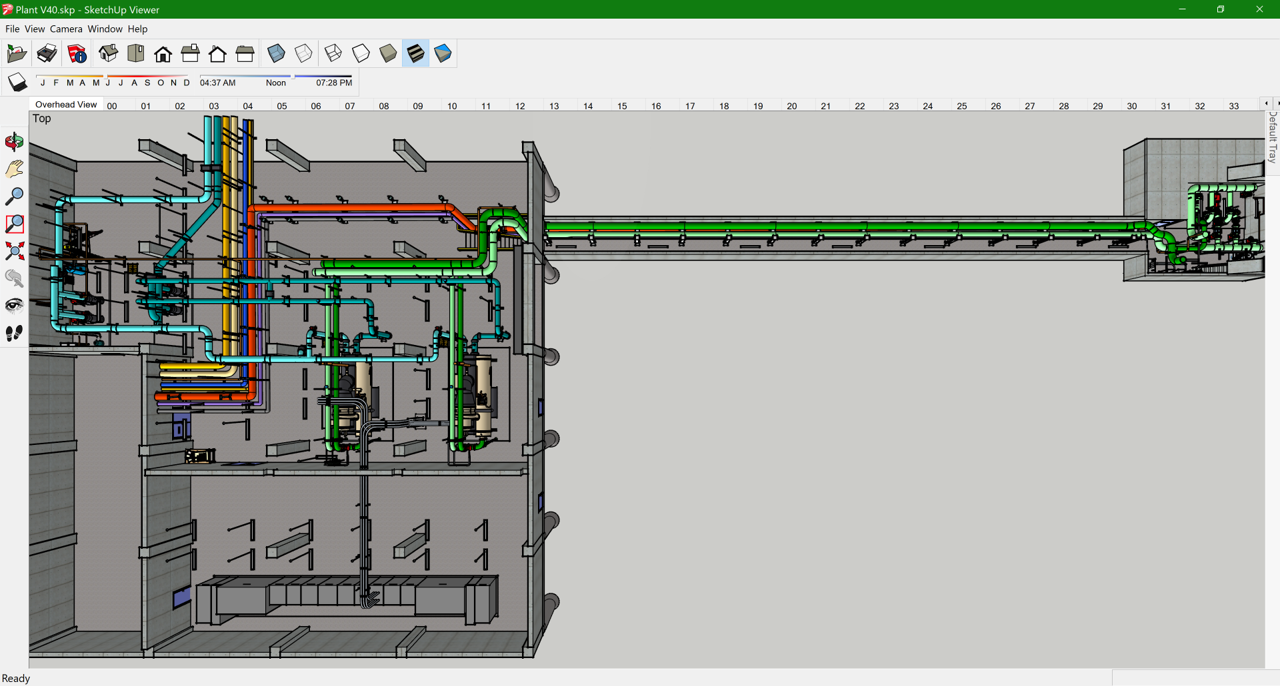
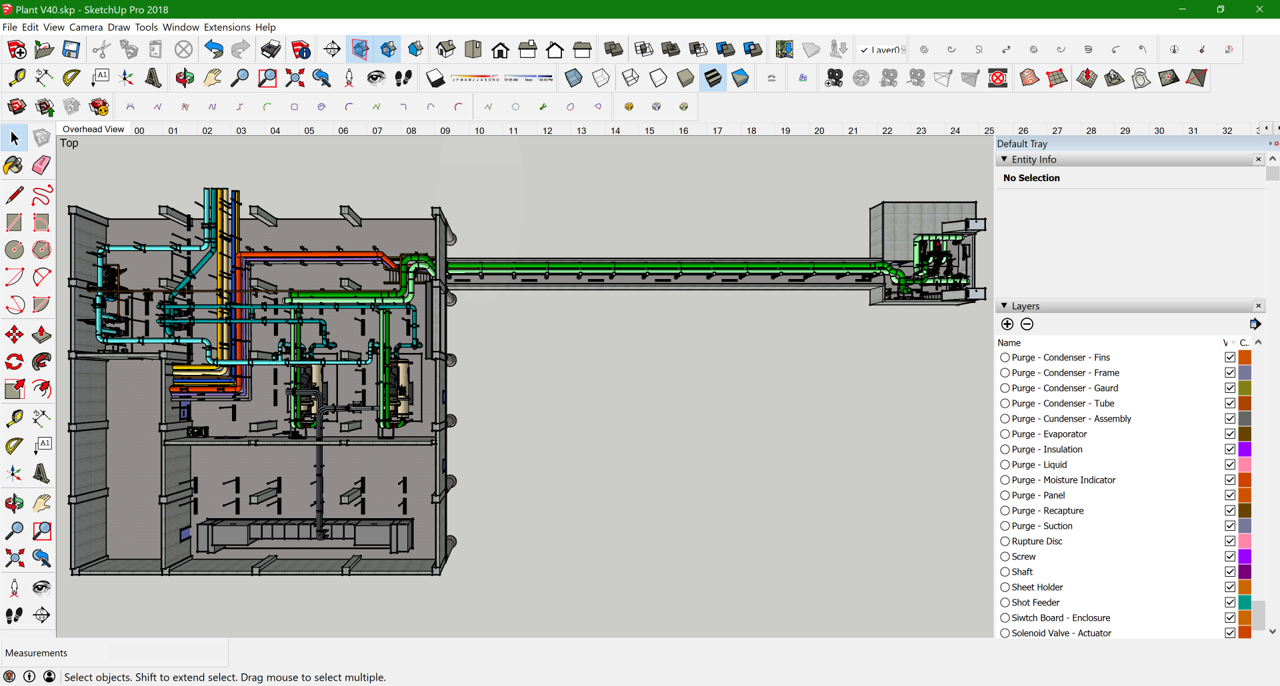
To give you a sense of the difference between the Viewer and a full working version, the upper image to the left is the current version of the central plant model in the SketchUp Viewer window with every possible tool turned on. The lower image is the same model opened up in SketchUp 2018 Pro, with all of the tool pallets and editing windows open. As you can see, with Viewer, you have basic navigation tools but that is about it. So it is much less intimidating to work with if all you really want to do is view a model.For any of the classes I teach using the models or any of the exercises on the web site that are based on the models, you would only need the capabilities provided by SketchUp Viewer with one minor exception. Specifically, you occasionally might find it convenient to take a measurement. |
There is a ruler tool included in the free and professional versions of SketchUp that will allow you to do that; it works just like a tape measure in the real world. But that feature is not available in SketchUp Viewer. Having said that, you would only need to use it occasionally if at all in my classes or to do the exercises. As a result, I don't think the lack of that feature will be limitation for you if you choose to go this route.
The only other constraint associated with SketchUp Viewer is that it requires a 64 bit computer to run. So, if you do not have a 64 bit computer and want to work with my models, then you will need to install one of the legacy versions of SketchUp, which you will find in the next section.
The only other constraint associated with SketchUp Viewer is that it requires a 64 bit computer to run. So, if you do not have a 64 bit computer and want to work with my models, then you will need to install one of the legacy versions of SketchUp, which you will find in the next section.
Option 2 - Using a Legacy Version of SketchUp
When the free version of SketchUp became web based, I discovered that my models were too large to upload into it, at least currently, as I mentioned above. Given how much I was using them for class-room teaching and how much time I had invested in that, there were a few anxious moments when I feared that I might not be able to continue using that approach.
Fortunately, when I contacted Trimble to understand what the options were, they provided links to legacy versions of their products so that I could make them available for you to use. In terms of deciding which version to select, here are the things to consider.
Bottom line, you may need to try a version and see how it works and if you have issues, try a different one. One way to do this is to try the oldest version and if it runs and you are happy with it, you will probably be just fine with it for working in the models in terms of the various exercises. But, if you decide you want to do some work of your own in the model, or maybe even make your own model, then you may want to try installing a newer version. Note that you do not have to uninstall the previous version to install a newer version.
Fortunately, when I contacted Trimble to understand what the options were, they provided links to legacy versions of their products so that I could make them available for you to use. In terms of deciding which version to select, here are the things to consider.
- You probably want the newest version that will run reliably with out slowing your machine down to a snails pace due to the graphic handling requirements. This issue will be especially noticeable when you are zooming around and navigating in the model. So, even if a version seems to install and run and is reasonably responsive and stable if you try to draw a few simple things in it, you may want to try opening a model and see how it works if you navigate around in the model. If it is painfully slow, you may want to try an older version of the software.
- With the release of SketchUp 2017, the program no longer supports computers with 32 bit operating system. So, if you have a 32 bit operating system, then you will only be able to use SketchUp 2016 or a previous version.
- SketchUp is a graphic intense program and thus will really "exercise" your graphics card. New machines on average will have graphic cards with better capabilities and as a result, from what I can tell, newer versions of SketchUp will push the graphics card harder than the older version. That means that if your experience with your machine indicates that it is stressed by highly graphic applications (games for instance), then you may want to opt for an older version of SketchUp.
- If you have a Windows machine and have trouble installing the 2014 version of SketchUp Make, then you may want to try to try the SketchUp Pro Version 8 install file below. which is my personal installation copy. That is as far back as I can go because that is when I started using SketchUp. If you install it, it should revert to the free version of SketchUp 8 at the end of the trial period (see A Few Details About Installing SketchUp and Using the Models below for more information about that). And so far (knock on wood), I have not run into a situation where a student needed an older version that SketchUp Version 8.
Bottom line, you may need to try a version and see how it works and if you have issues, try a different one. One way to do this is to try the oldest version and if it runs and you are happy with it, you will probably be just fine with it for working in the models in terms of the various exercises. But, if you decide you want to do some work of your own in the model, or maybe even make your own model, then you may want to try installing a newer version. Note that you do not have to uninstall the previous version to install a newer version.
Downloads
|
| ||||||||||||||||
| SketchUp Pro - Version 8 - Windows (sketchuppro_version_8_windows_english.zip) |
A Few Details About Installing SketchUp and Using the Models
When you install a version of SketchUp, what actually happens is that you install the full blown professional version in a "Free Trail" arrangement. Depending on which version you select the trial period will be based on a certain number of days, a certain number of hours of use, or a certain number of sessions.
|
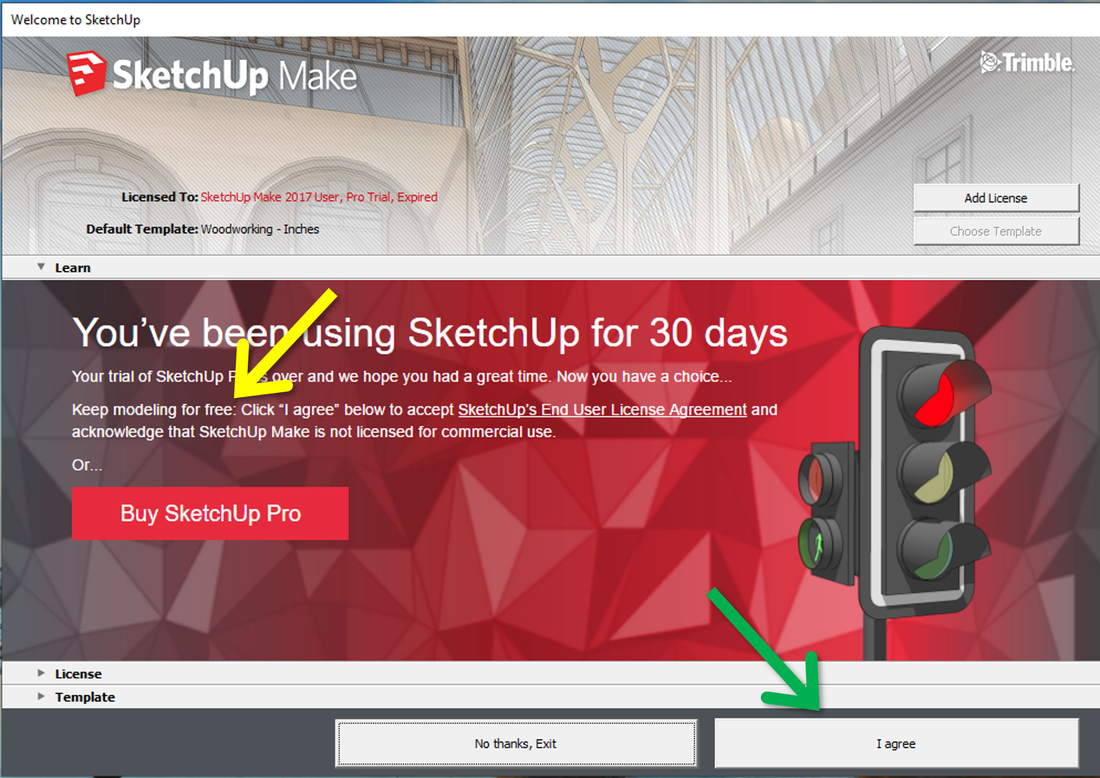
After the trial period ends, you will get a message warning you that your trial is over and that you need to purchase a license to continue using SketchUp. Typically, it will look something like the image to the left.
What the message actually means is that to keep using the Professional version of SketchUp, you need to add a license But if you read it closely (the yellow arrow), it also says that you can keep using the free version by clicking on the "I Agree" button (the green arrow). If you do that, you will get some sort of licensing agreement that you need to agree to and then the software should revert to the free version. |
|
The models have been back-saved as SketchUp version 8 files to ensure they will open with older versions of SketchUp. So they should work with any version of SketchUp from Version 8 forward.
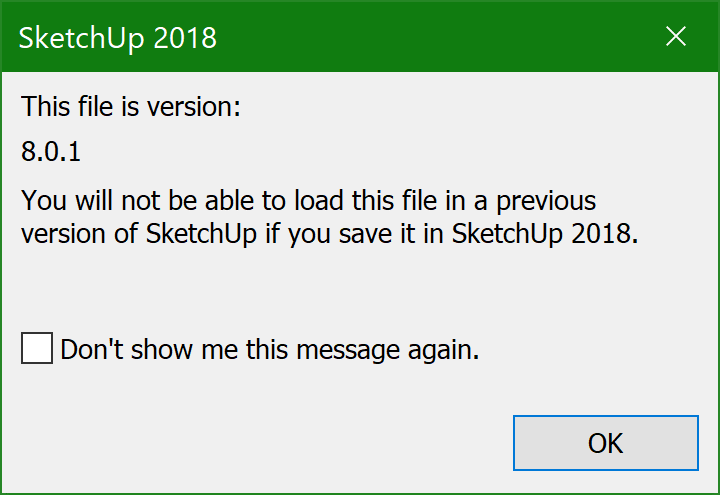
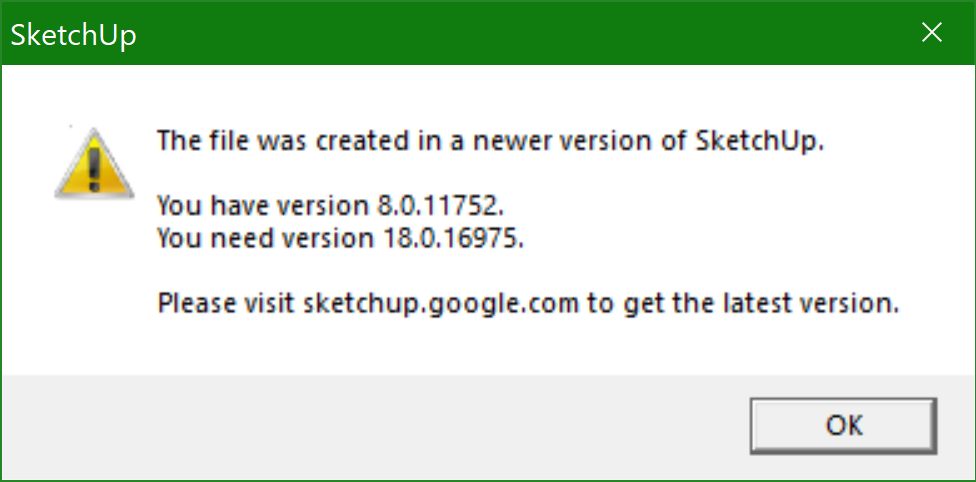
But, if you open them in a version newer than version 8, you will get a little warning telling you that the file was created in an older version and that if you save it, it will be converted to the format associated with the version of SketchUp you are running. All you need to do is acknowledge that and continue working. |
|
Having said that, if you see the message to the left, it means the old fart forgot to back-save the model and you will need to get in touch with him to ask him to get it right. I'll just apologize in advance. But for what it's worth, I reinstalled my copy of version 8 and now try to make it a habit of making sure I can open the models with it prior to posting them.
|
If you save the file, then it will be saved in the format associated with the version of SketchUp you are using. If you don't save it, then the message will show up again the next time you open the model. In either case, you do not need to upgrade SketchUp to work with the model.

|
For most of the SketchUp installation I have done, the "Welcome to SketchUp" window is opened when you launch the software by default. This gives you access to a number of things like tutorials, templates and a place to enter license information. (Templates are "empty" drawing files that have certain things like the back ground colors and line styles preset.)
To move forward, click the "Start Using SketchUp" button (green arrow). If you got to that point by double clicking on a model file in Explorer, then the model should open. If you got to that point by launching SketchUp, then it should open with an empty window and you can use the File drop down menu to navigate to the model you want to open. |
If you would rather not go through that every time you launch SketchUp, you can just uncheck the "Always show on start-up" box (red arrow). You can always get to this window by selecting it from the Help drop down menu.
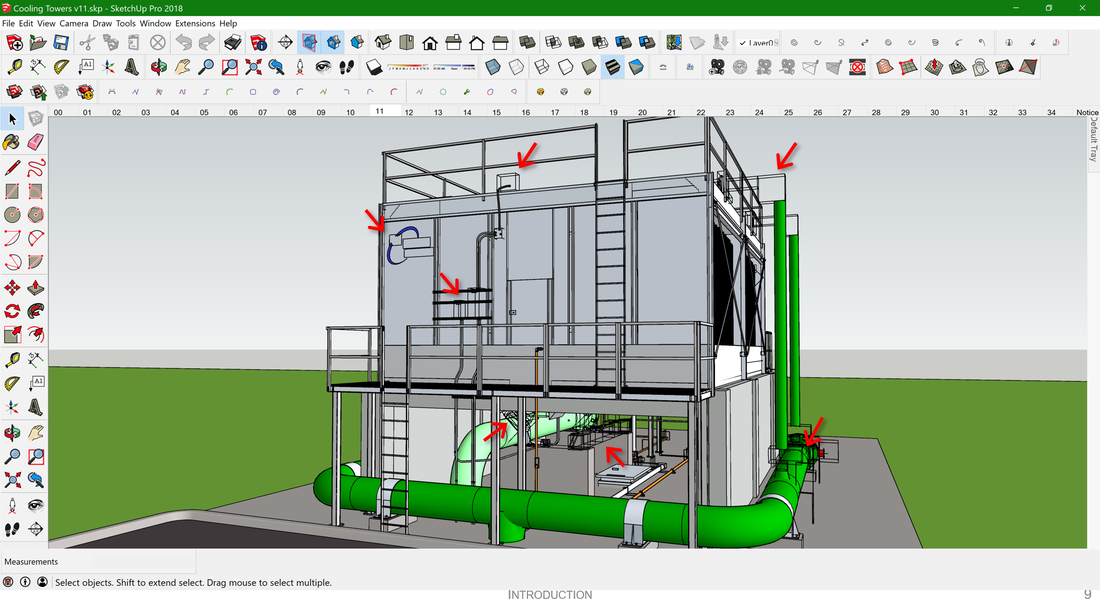
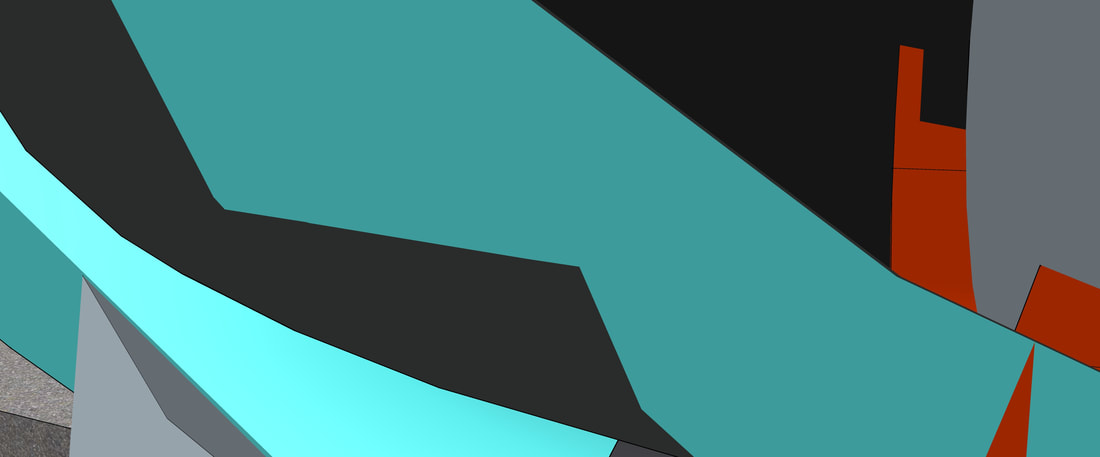
Most of my models are fairly large due to the amount of detail in them. This can make your computer sluggish if it is an older machine and/or has a slower microprocessor or graphic card with limited functionality. The symptom of this is an image that has a lot of wire frames in it for a few seconds (or more) as you pan and move around (left image, where the red arrows are pointing). If you wait, the wire frames will eventually fill in (image to the right).
|
|
There are things I am learning to do that minimize the impact of large models on slower machines with less sophisticated graphics cards. But for some of my earlier models, I will need to go back and rebuild some of the elements to address the issue. Meanwhile, if you are having the issue, here are some things to try.
- Close other applications that you are not using while working on the model, which will tend to free up some memory and processing speed.
- Use the scene tabs to change position in the model, especially big changes, then zoom and pan to fine tune your view after the scene tab gets you in the right general area.
- Turn off layers that you might not need. Note that you will not be able to do this in SketchUp Viewer since it does not support layer management. And you will have to use trial and error to figure out which layers make a difference, But the layer names are fairly descriptive of what they are associated with and the thing that matters in terms of speeding things up is reducing the number of edges and lines that are visible.
|
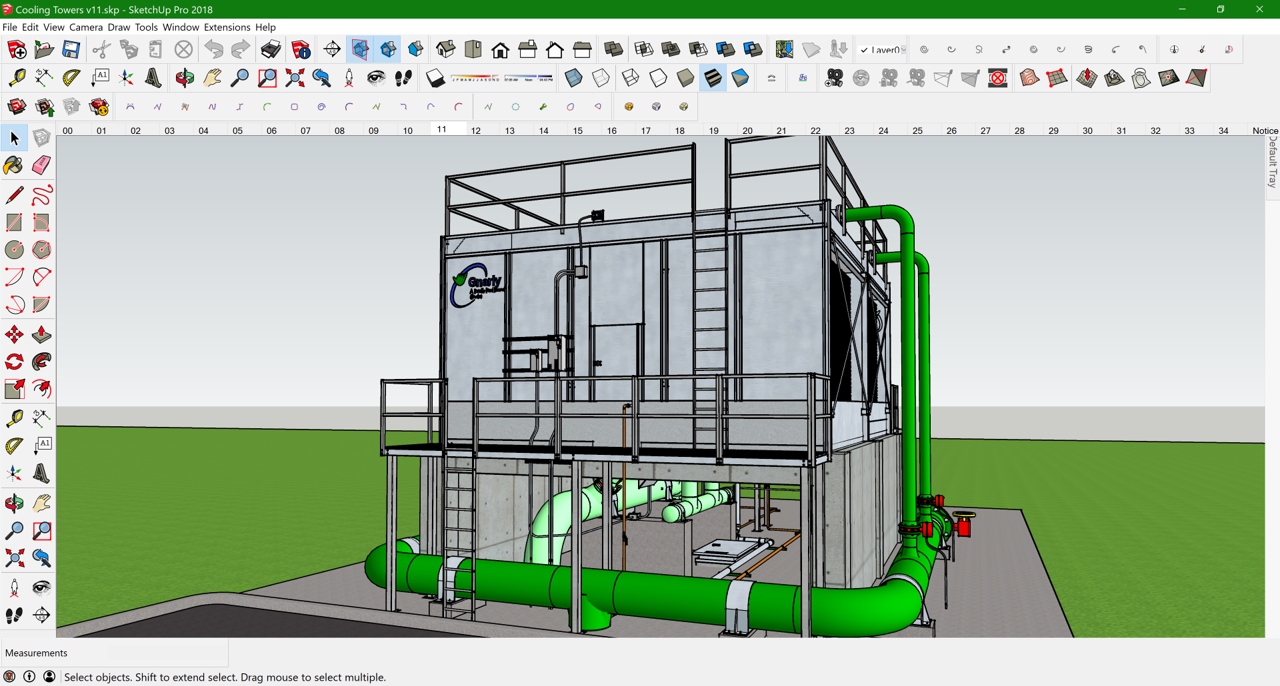
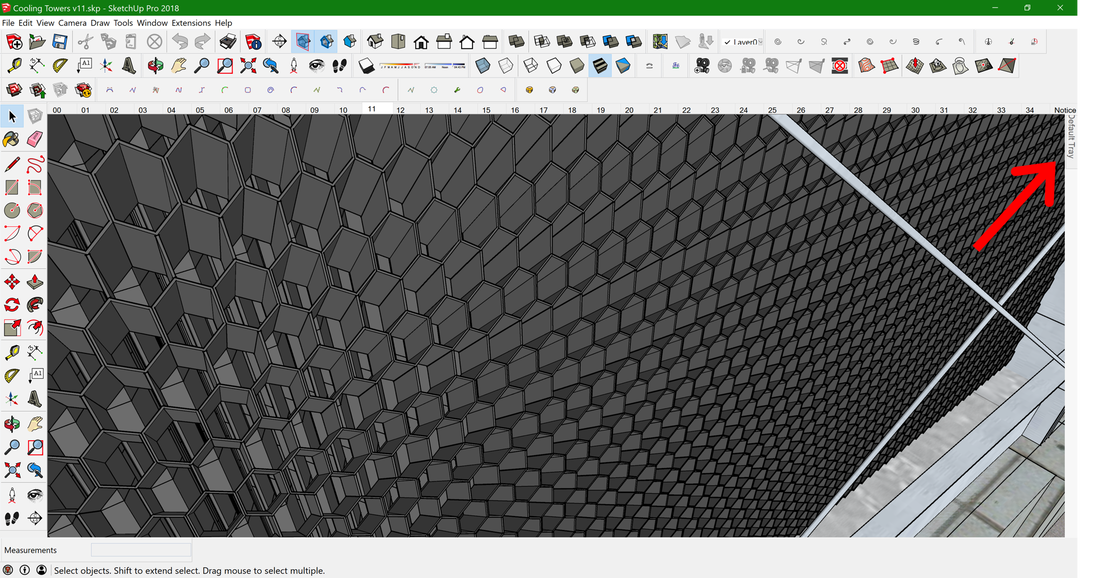
With regard to the last item, the "Fill" layer in the cooling tower model is a good example. As you can see, in the image to the left, there are many, many, many lines associated with drawing the fill. And, if you really want to know what a cooling tower looks like, you need to have it on.
But, if you are navigating around in the model looking at other things, then turning that layer off will make things go faster. |
Similarly, some of the models have layers call "Major Assembly XYZ" that will allow you to turn off very large segments of the model, like all of the structure, or all of the chilled water plant equipment and piping, which will also let you navigate more quickly. But, of course, you may want to see something in the major assembly so turning it of may seem like a bad plan. However. It is possible to make mental note of about where you want to navigate to from a given location in a model, then turn the major assembly off, navigate to that point, and then finally turn the major assembly back on again.
For most of the models, the opening scene is a clip board with the copyright notice on it. To facilitate the model's opening quickly, I frequently turn off the Major Assembly layers and layers with large items on them (like the cooling tower fill) for that scene. That means if you navigate from that scene - say you zoom out for instance - there might not be much there because most of the layers are turned off. But, if you simply select a different scene to start your navigation, the appropriate layers will be turned back on again.
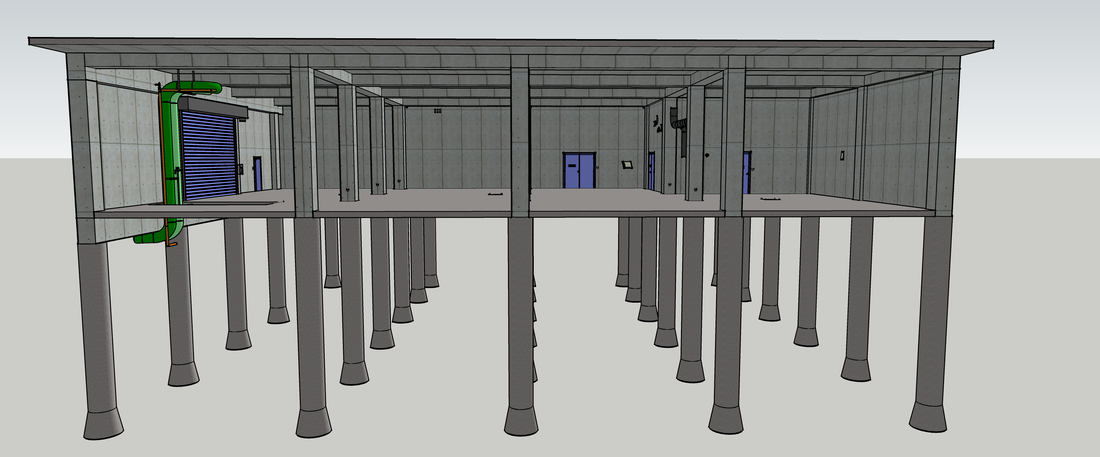
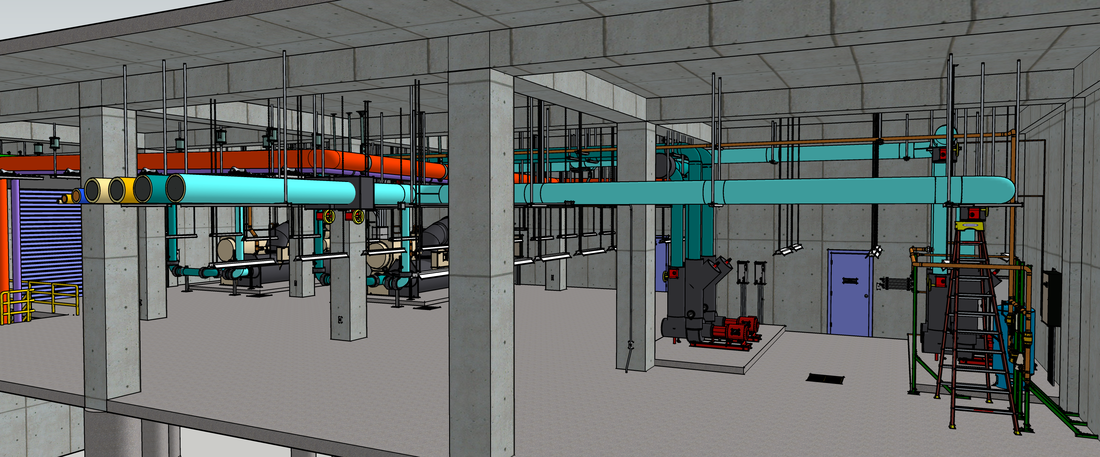
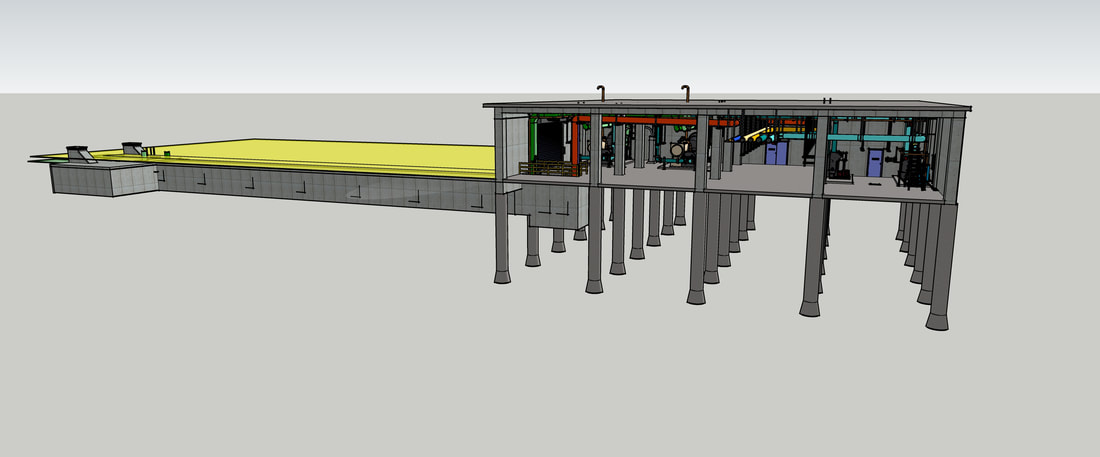
For example, the left image below is what you would see if you opened the central chilled water plant model. if you simply zoomed out in that scene, you would end up with the center image; not much to see. But if you selected the tab for scene 00, you would end up with the image on the right, which has the major assemblies turned back on again. Of course, you could also open the layer manager and turn the major assembly layers back on.
For most of the models, the opening scene is a clip board with the copyright notice on it. To facilitate the model's opening quickly, I frequently turn off the Major Assembly layers and layers with large items on them (like the cooling tower fill) for that scene. That means if you navigate from that scene - say you zoom out for instance - there might not be much there because most of the layers are turned off. But, if you simply select a different scene to start your navigation, the appropriate layers will be turned back on again.
For example, the left image below is what you would see if you opened the central chilled water plant model. if you simply zoomed out in that scene, you would end up with the center image; not much to see. But if you selected the tab for scene 00, you would end up with the image on the right, which has the major assemblies turned back on again. Of course, you could also open the layer manager and turn the major assembly layers back on.
|
|
|
|
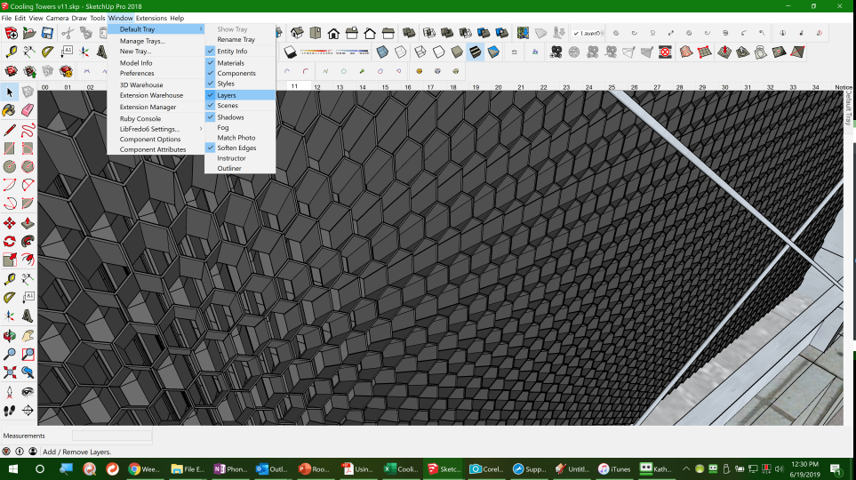
In any case, to turn a layer on or off, the first thing you need to do is make the layer manager menu visible. One way to do that is to select "Layers" on the Default Tray drop down menu as shown on the image to the left. Note that in the screen shot, I also have a number of other functions checked, but the "Layers" one is the only one you need to do what we are discussing.
|
|
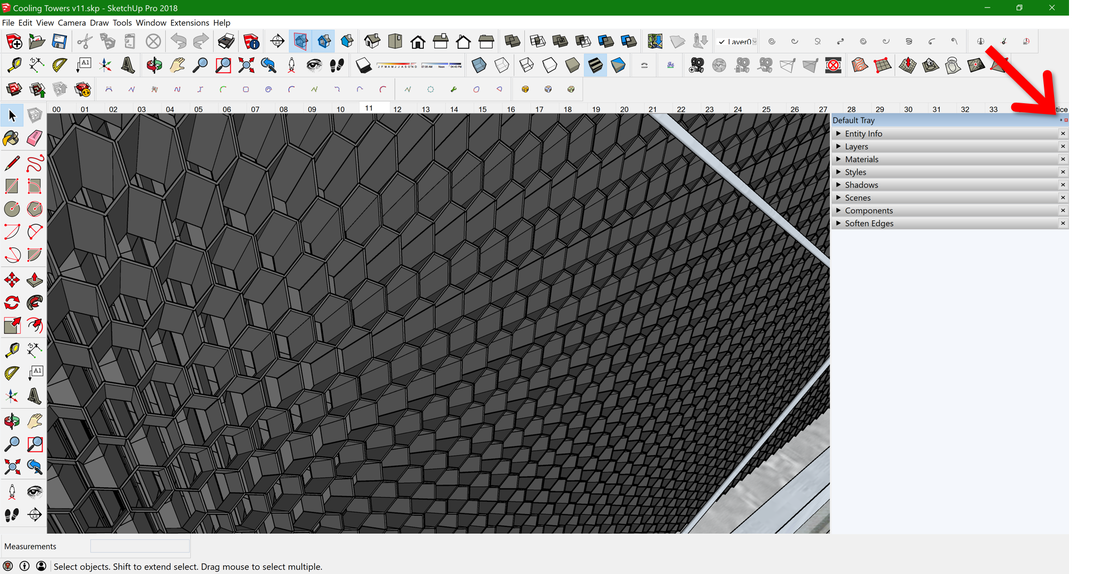
Once you have selected one or more of the items under the Default Tray menu, you will notice a little tab on the right side of the screen called "Default Tray" (red arrow in the image to the left). Note that it may have already been there if any of the other Default Tray boxes were checked when you started down this path. I believe that most SketchUp installations have a few of them selected by default.
|
|
If you hover over the tab, a pallet full of drop down menus will float out from the right side of the screen. If you move away from the tab, it will auto-hide back off the screen. But, you can lock it in place by clicking on the little thumb tack icon that will show up at the top, upper right side of the pallet (red arrow in the image to the left).
There will be a drop down menu for any of the boxes that were check on the Default Tray menu. You can change their order by dragging them up and down the stack. |
|
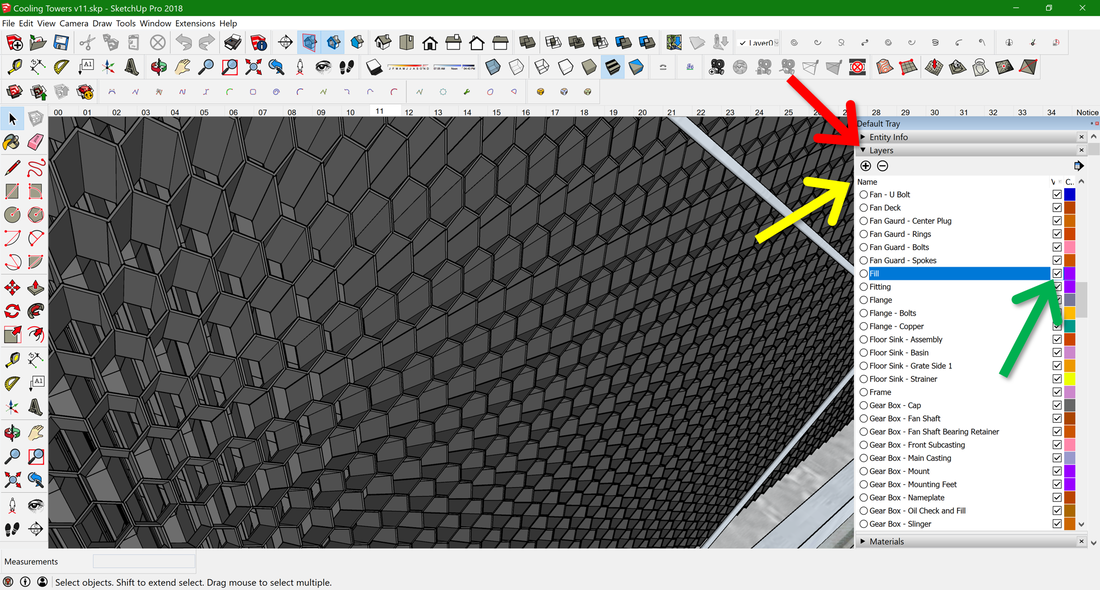
If you click on the little black triangle next to a drop down menu name (red arrow in the image to the left), it will open up. If you click on "Name" at the top of the column (yellow arrow), the layers will sort alphabetically by name with the visible layers first.
Once you find the layer you want to turn off, highlight it by clicking on its name. Then un-check the little "visible" box to turn it of (green arrow). |
|
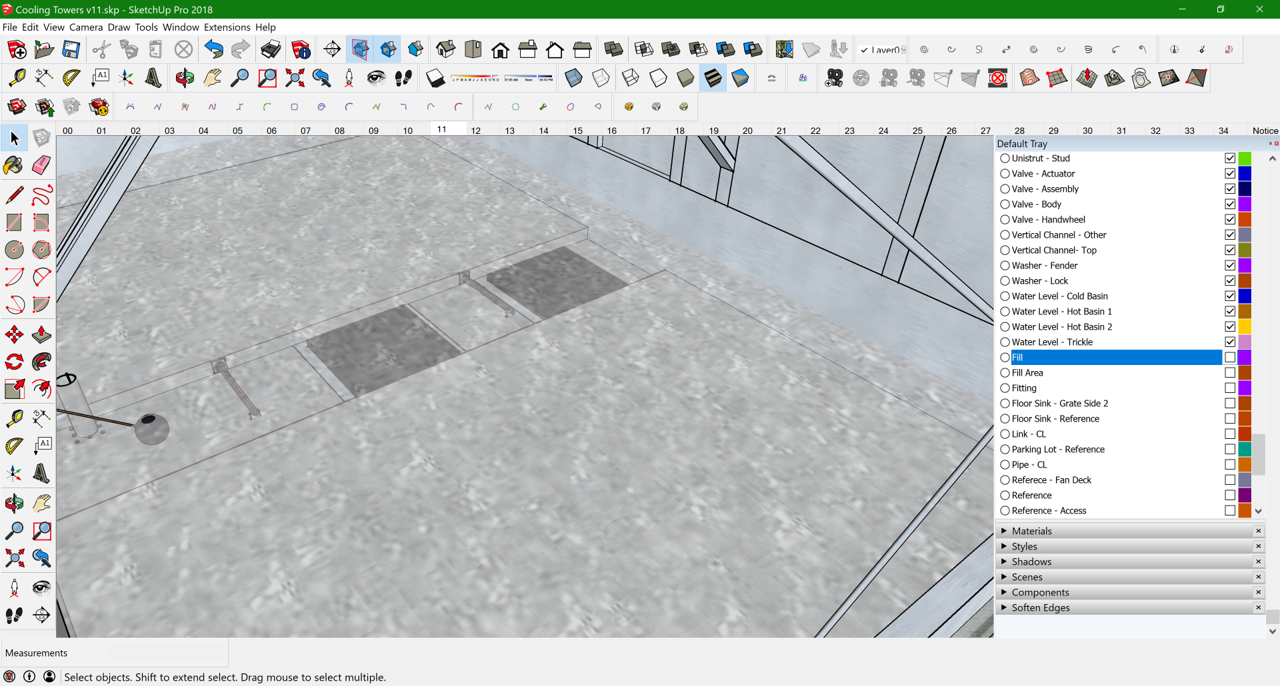
When you do that, the selected layer will turn off and the layer will shift down to the bottom of the list where the layers with the "Visible" box un-checked are located in alphabetical order. You can turn the layer back on by checking the box again.
|
When you are navigating around in SketchUp, you have super human powers, including the ability to walk through solid objects.

|
|
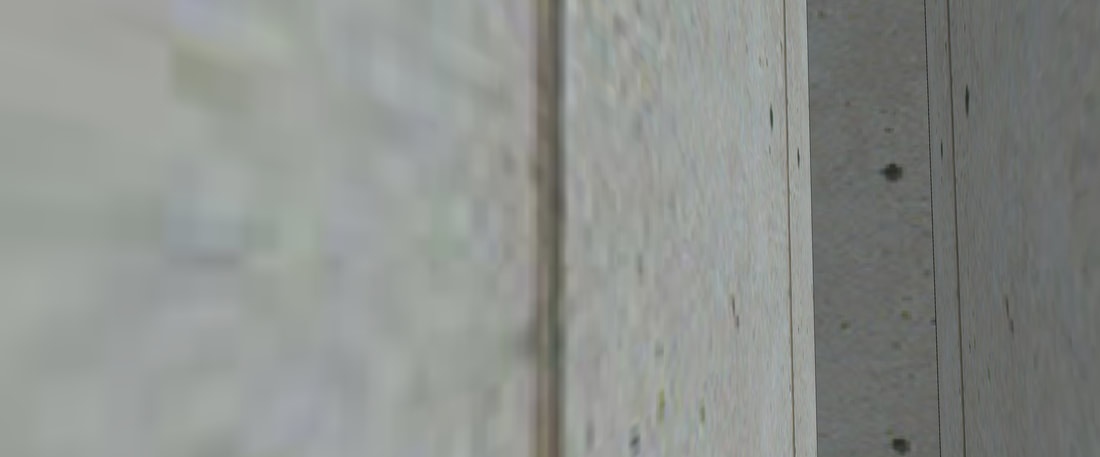
As a result, sometimes when you are zooming and panning around, you end up in a totally odd looking place, like some of the images to the left.
When that happens, you are probably inside something like a pipe (upper left). a wall (upper right), a pump (lower left), or a chiller (lower right). |
|
If (when) that happens, the fast way out is to hold down "Ctrl" plus "Shift" plus "E", which is the keyboard short-cut for "Zoom to Extents". That will change your position to a remote corner of the model, as illustrated in the lower image to the left. From there, you can navigate back to a place you want to be.
Clicking on a scene tab is another way to get out of this situation. |
Using Scenes and Scene Guides
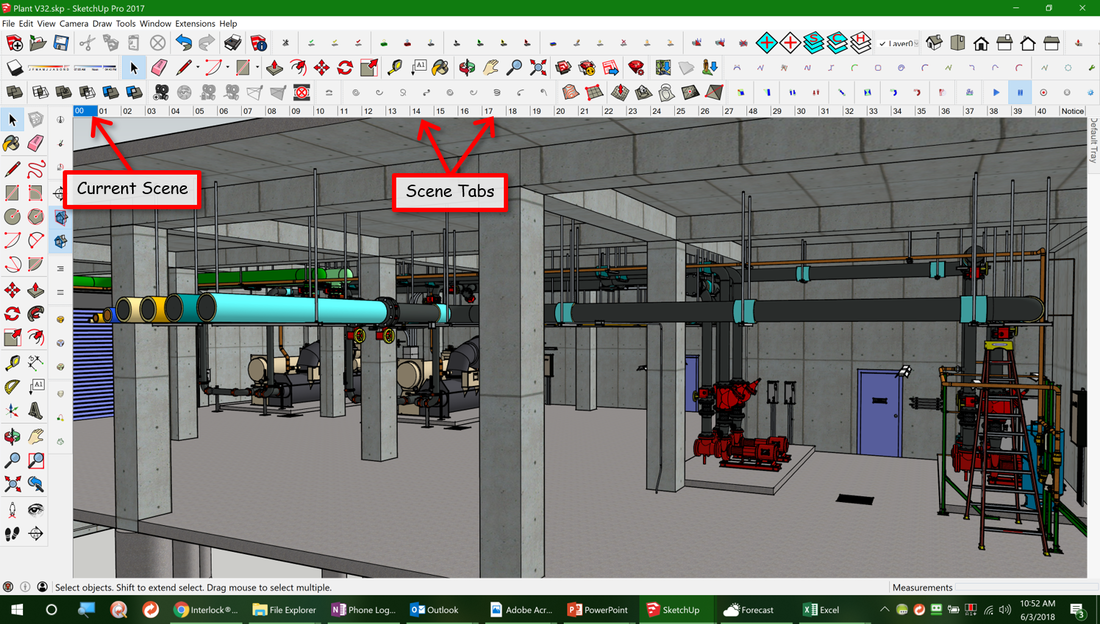
One of the more useful features in SketchUp is the ability to navigate by using Scenes. Scenes are simply stored views which, when you select them positions the camera at a certain point in the model and sets up other parameters like which layers are on or off. The capability to use them exists in all versions of SketchUp, including SketchUp Viewer. The image below is a screen shot of the SketchUp window with the chiller plant model open in it with the Scene tabs highlighted.
|
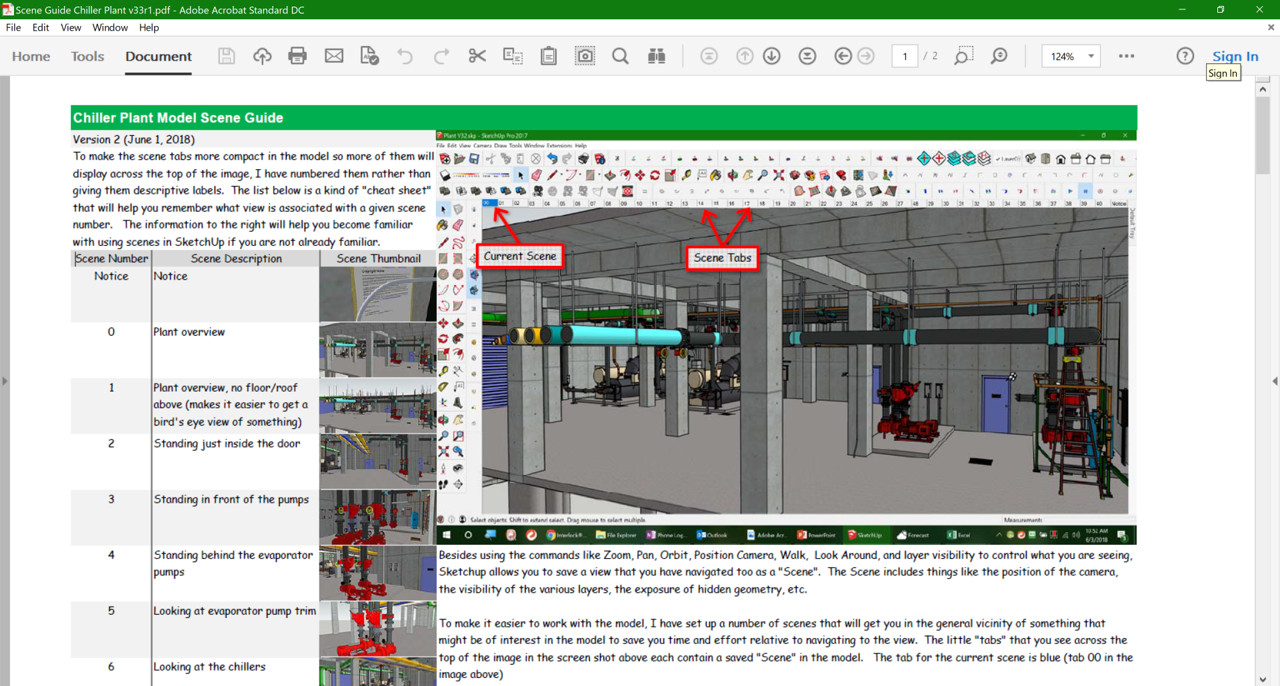
To facilitate navigation in the models, I have made what I call Scene Guides, an example of which is shown to the left. The scene guides consist of information about what scenes are and how to make the scene tabs visible if they are not already visible when you open the model (the right side) along with a table that consists of three columns;
The first column has the scene number, which is the number on the little scene tabs that run across the top of the model window. |
The scenes I create typically target an important feature of the model or the clues that lead you to recognizing a commissioning opportunity. The second column contains a short description of the scene along with a thumbnail image of it to the right of it in the third column.
|
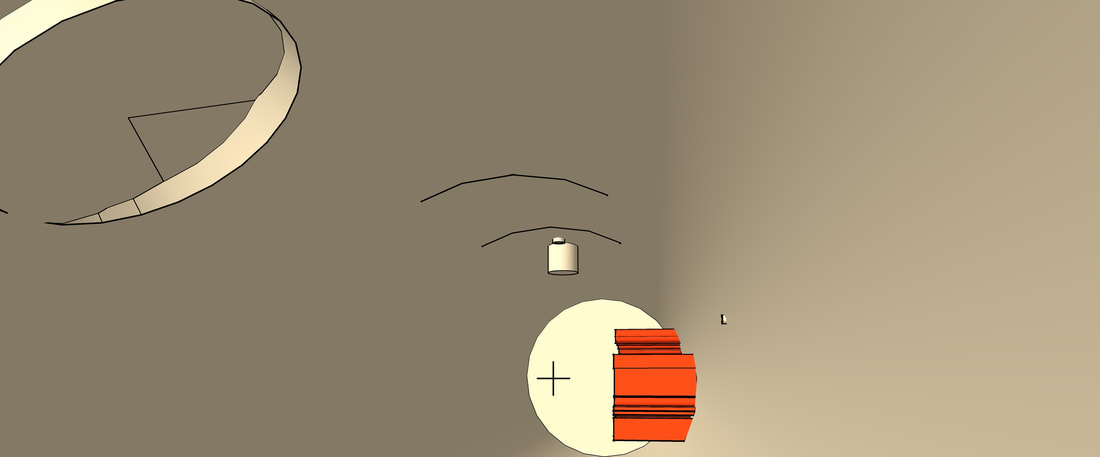
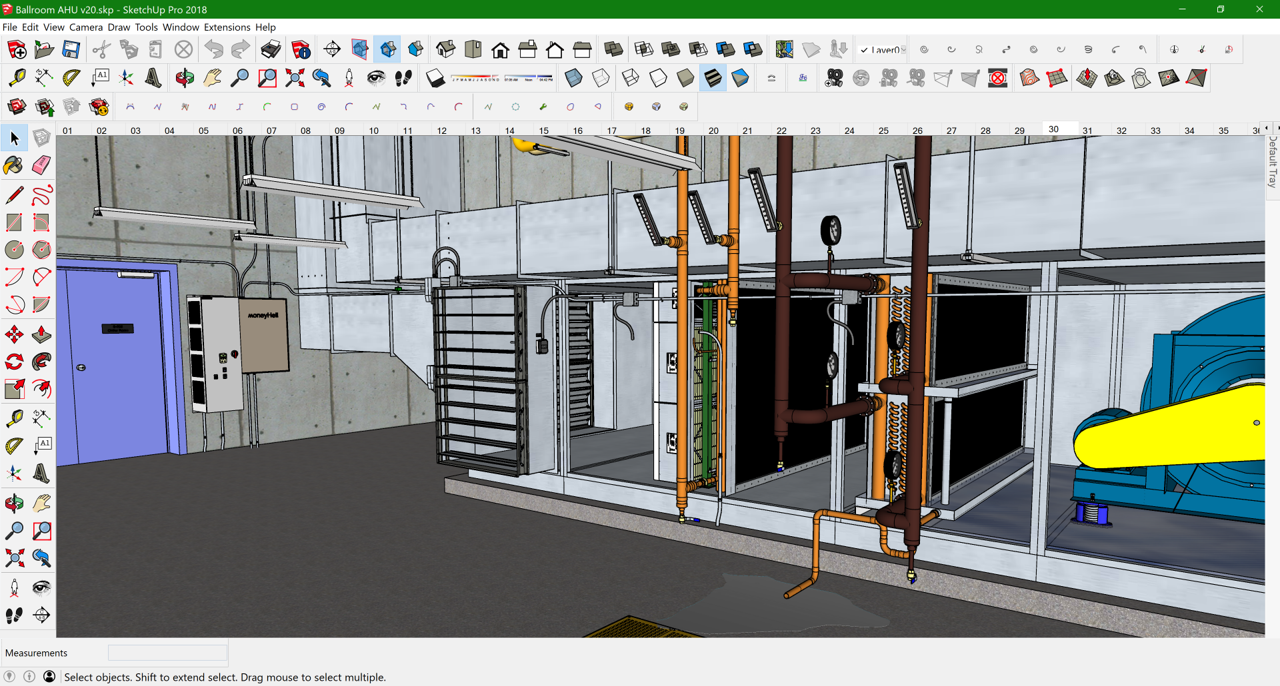
In some of them, I have turned a layer off to make some item in the model readily accessible. For instance, in the image to the left, which is a scene in the Ball Room AHU model, I turned off the casing of the AHU so you can more readily access the interior of the unit.
|
|
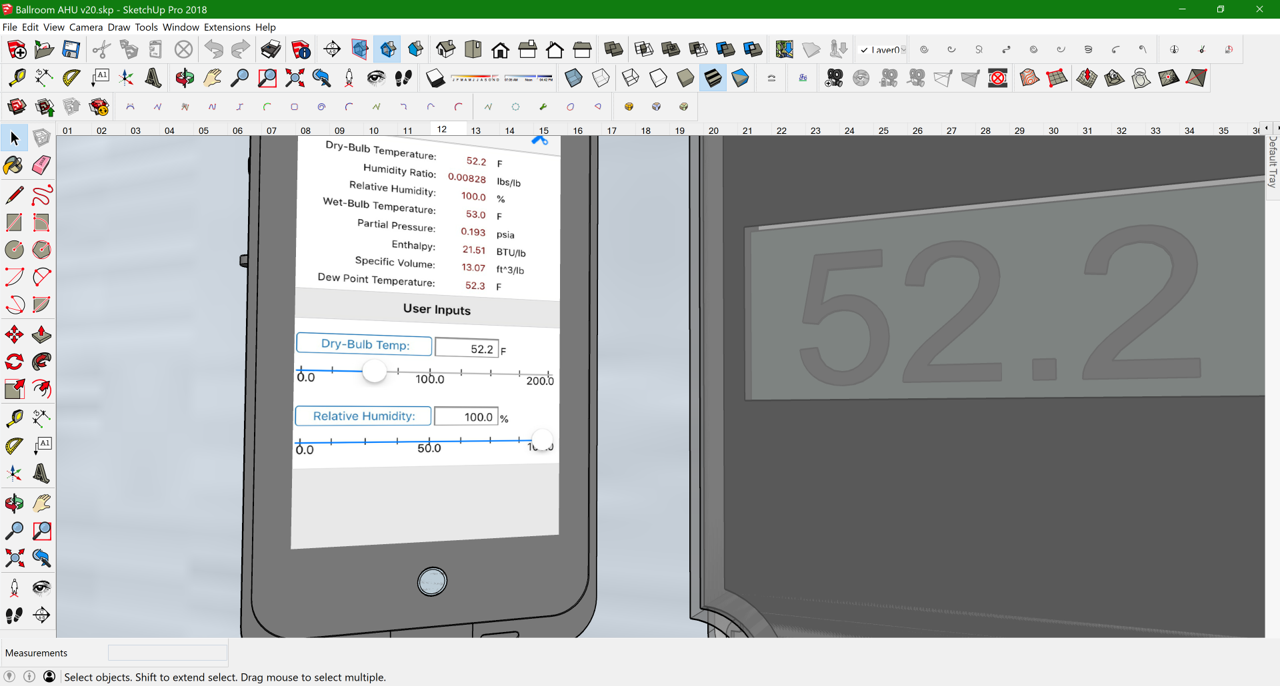
Or I may have a scene set up that provides you with a bit of information from a phone app. For instance, in the scene to the left, you can read the enthalpy of the outdoor air based on the data from the outdoor air temperature sensor and an assumption you make about the outdoor air humidity using the HVAC Toolkit app. The phone is made visible in this particular scene but the layer it is on is turned off for the others.
|
So bottom line, scenes make it faster to navigate to a particular point in the model, get you in the vicinity of important clues and information, and reveal things with one mouse click that would otherwise required that you open the layers manager to turn layers on and off.
Resources for Learning to Use SketchUp
The SketchUp community is large and very supportive. As a result, there are a wealth of resources out there that support the basic software package including "plug-ins" (many free) that provided enhanced functionality or streamline common work-flow items. There are also video tutorials, many of which are on YouTube.
To work with the models for classes and exercises, all you really need to know how to do is navigate through them and occasionally take a measurement. To learn those things, I found the following tutorials to be useful.
To work with the models for classes and exercises, all you really need to know how to do is navigate through them and occasionally take a measurement. To learn those things, I found the following tutorials to be useful.
- You can learn the basics of panning, orbiting, and zooming by watching this tutorial.
- You can learn how to take a measurement with a little tool that looks and works just like a real tape measure by watching this tutorial.
- If you want a more realistic perspective on things as you move through the models, then you may want to try the SketchUp camera tool set. These tools allow you top pick a point in the model as the location where you are standing and then set the perspective to your eye height. Once you do that, you can look around and "walk" through the model; its "almost like being there".
- All of my models include "scenes". These are simply saved settings that, when you select them, position you at a particular point in the model with a particular perspective, and maybe some of the layers turned off so you can see inside of things. The Scene Guides I include with the model downloads include an explanation of how to use them, but this video will complement that if you are interested in knowing a bit more.
The tutorials above are all you really need to know to work with the models in class or for self study purposes. But you may find yourself intrigued by SketchUp and its capabilities and its intuitive nature. So if you want to learn more so you can design your dream house, then you will find a number of YouTube channels dedicated to SketchUp. Personally, I refer to the "official" SketchUp channel frequently, but also have links to many other saved.
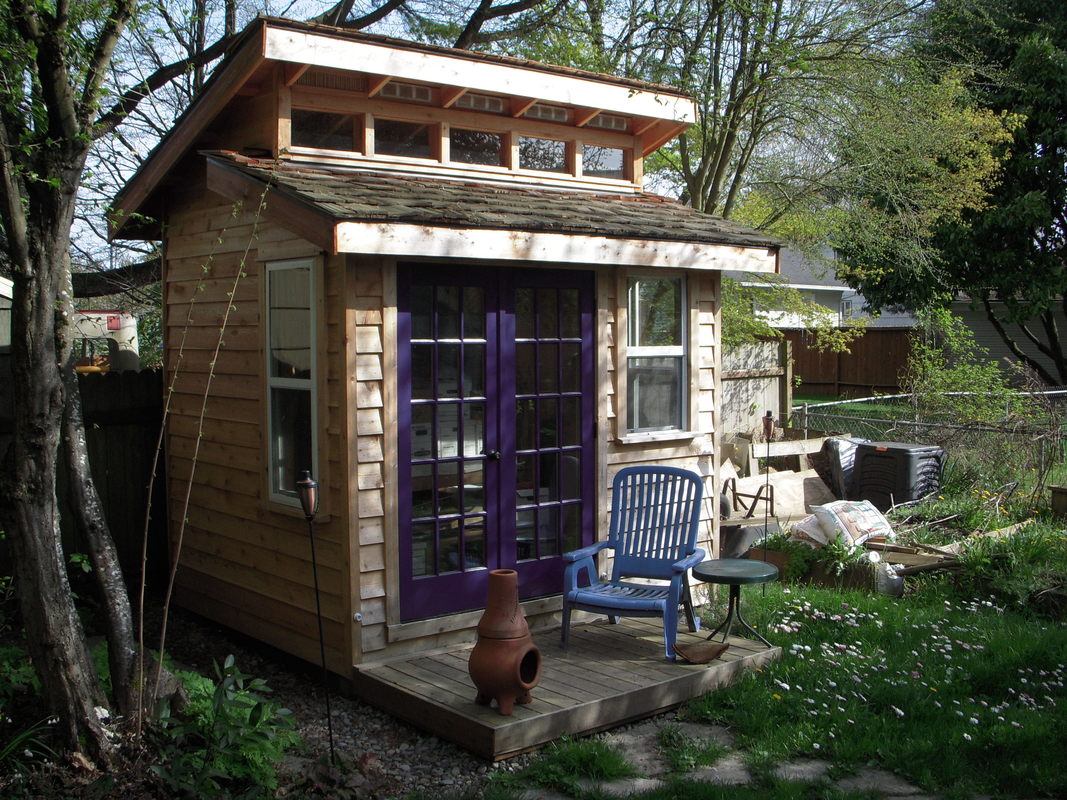
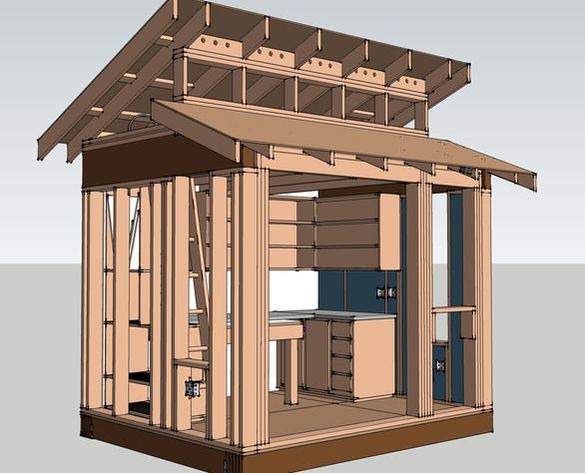
Developing a simple model is a great way to learn SketchUp. In fact, the way I learned to do the basics was to design an Art Studio for Kathy, my bride. I did it by making two by fours and then framing it up, sheathing it, and going through all of the steps I would need to go through when I built it. Not only did the process help me to learn SketchUp, it helped me with the actual construction of the project and helped Kathy visualize how things would look, including how the light and shadows would play out as the sun moved across the sky.
Developing a simple model is a great way to learn SketchUp. In fact, the way I learned to do the basics was to design an Art Studio for Kathy, my bride. I did it by making two by fours and then framing it up, sheathing it, and going through all of the steps I would need to go through when I built it. Not only did the process help me to learn SketchUp, it helped me with the actual construction of the project and helped Kathy visualize how things would look, including how the light and shadows would play out as the sun moved across the sky.
|
|
Informal Webinar Videos on How to Get Started with SketchUp
I recently did two informal webinars to help students planning to attend classes at the Pacific Energy Center where we will be using SketchUp get up to speed. The videos are essentially a recording of my walking folks through the resources on this page and explaining them in person.
So, if you are about to attend a class where we will be using SketchUp, you may find these videos helpful in terms of preparing for the class. And folks who are simply visiting the site and want to try their hand at some of the exercises that we have made available that use the models may also find them helpful.
Both videos are about the same so it is likely that you will only need to watch one of them. The reason I put both of them up is that the folks who actually attended the sessions were I recorded them may prefer to have that specific video to reference.